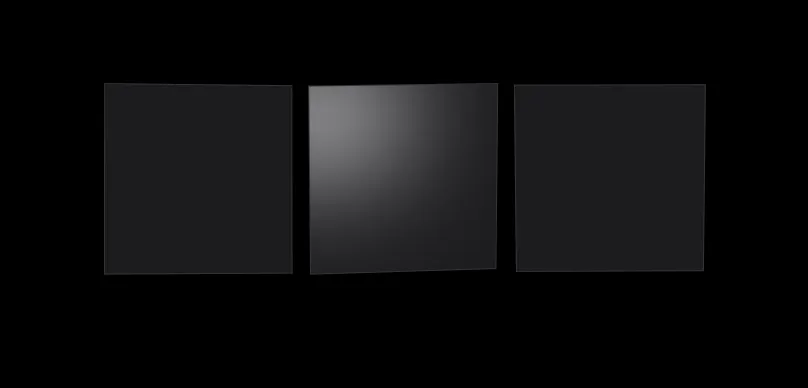
前几天在网上看到了一个很有趣的动画效果,如下,光会跟随鼠标在卡片上进行移动,并且卡片会有视差的效果,那么在 React 中应该如何去实现这个效果呢?

其实实现思路很简单,无非就是分几步:
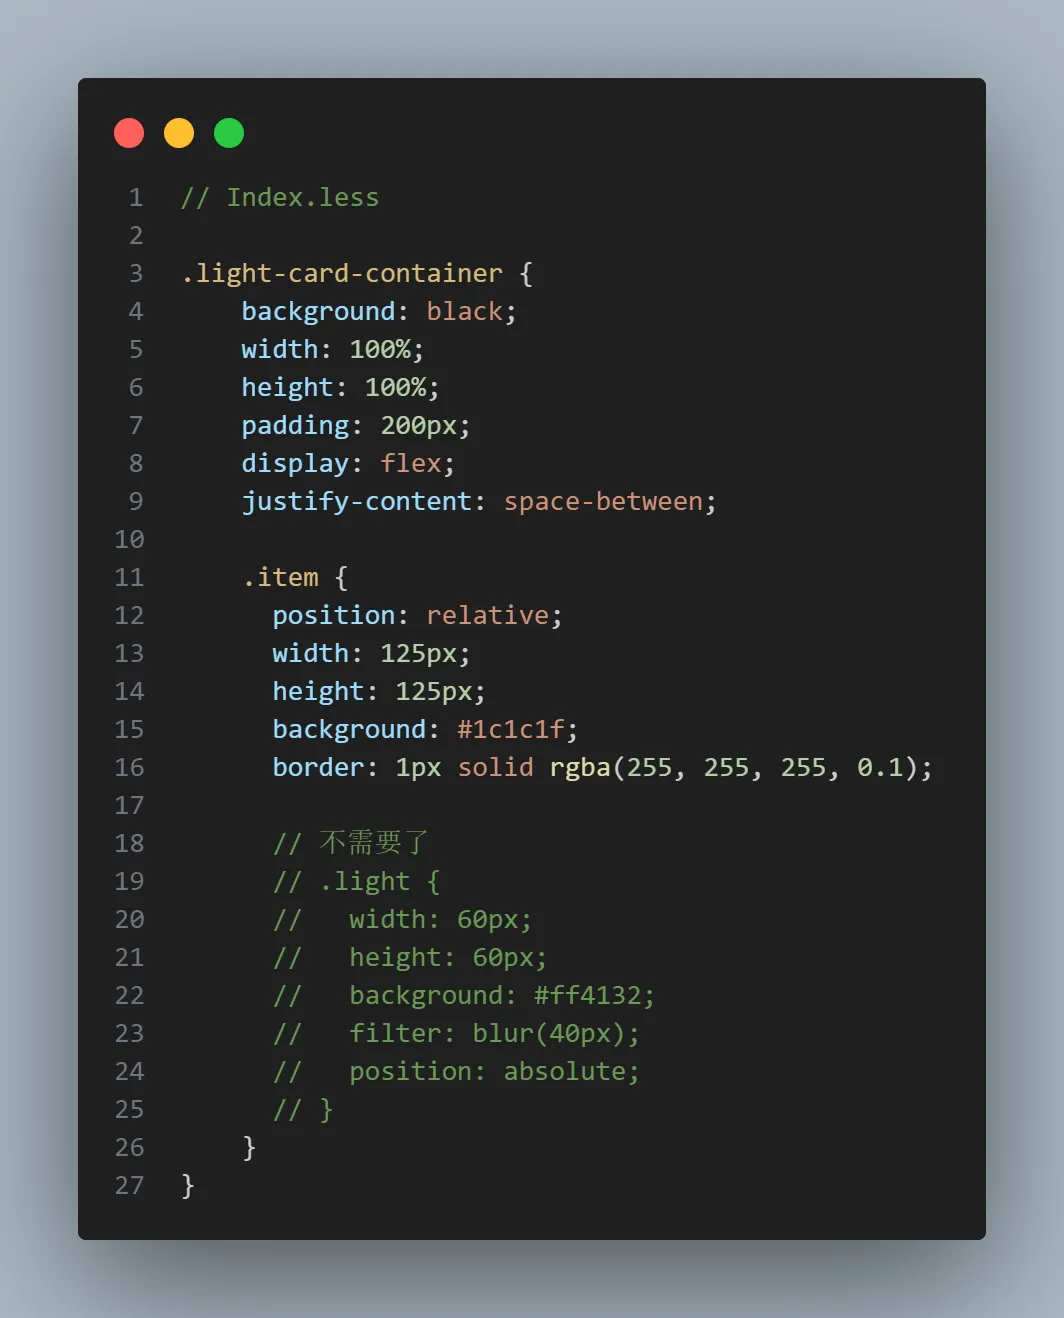
我们先在 Index.tsx 中准备一个卡片页面,光的CSS效果可以使用filter: blur() 来实现:

卡片的视差效果需要用到样式中 transform 样式,主要是配置四个东西:

上面只是给一个卡片增加光源,接下来可以给每一个卡片都增加光源啦!!!

上面的代码,总感觉这个 hooks 耦合度太高不太通用,所以我们可以让光源变成可配置化,这样每个卡片就可以展示不同大小、颜色的光源了~像下面一样:

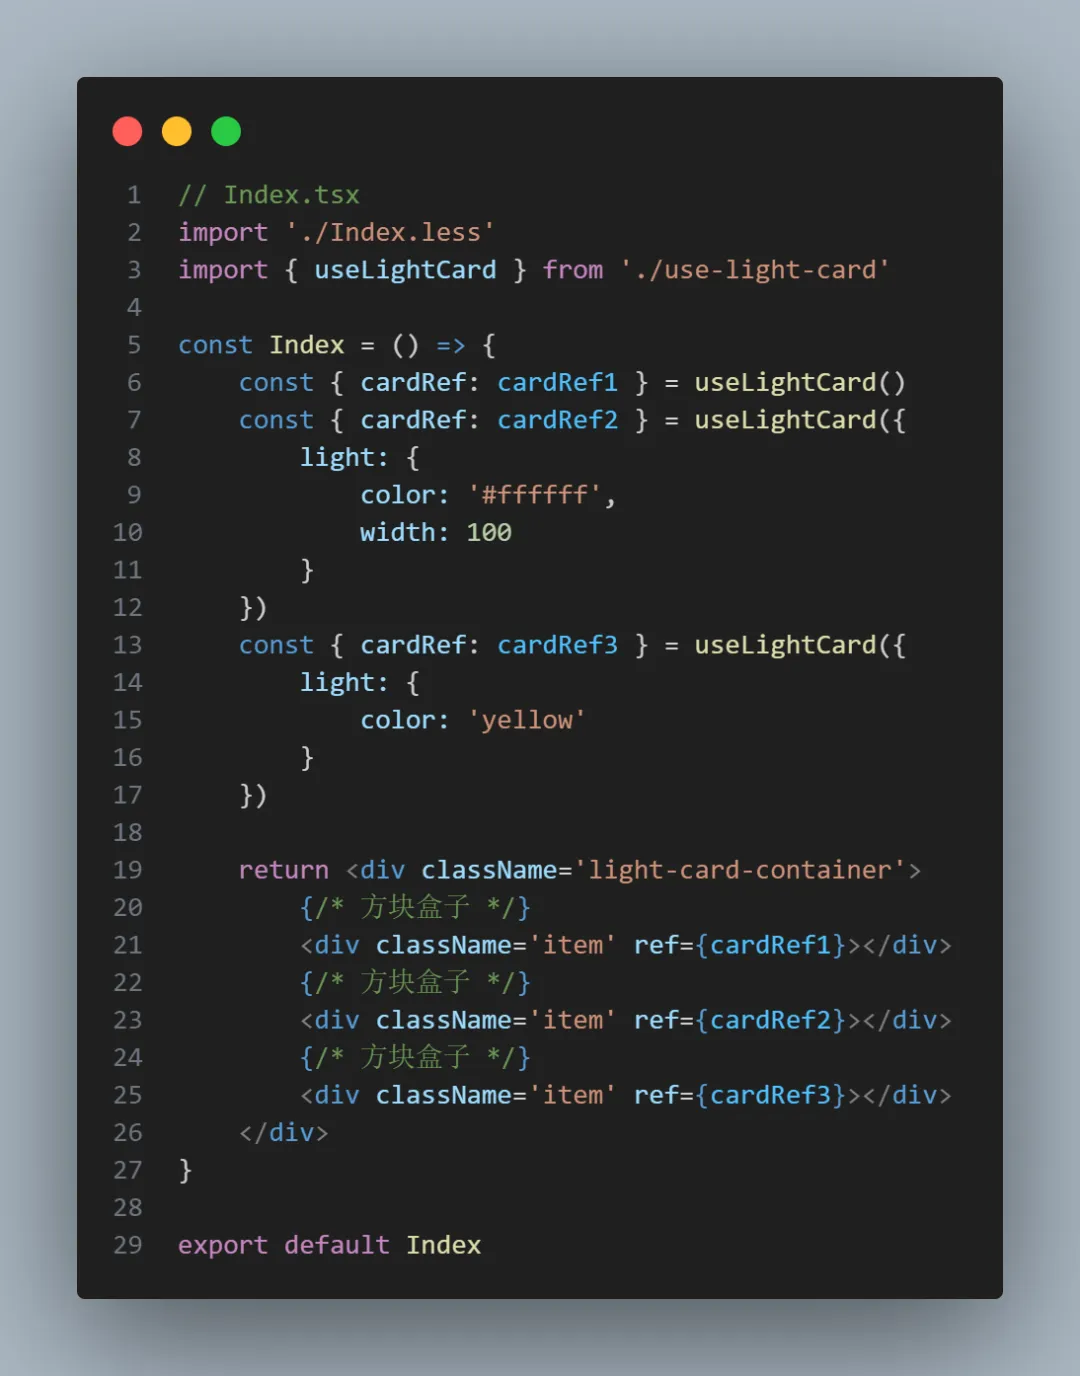
既然是配置化,那我们希望是这么去使用 hooks 的,我们并不需要自己在页面中去写光源的dom节点,也不需要自己去写光源的样式,而是通过配置传入 hooks 中:


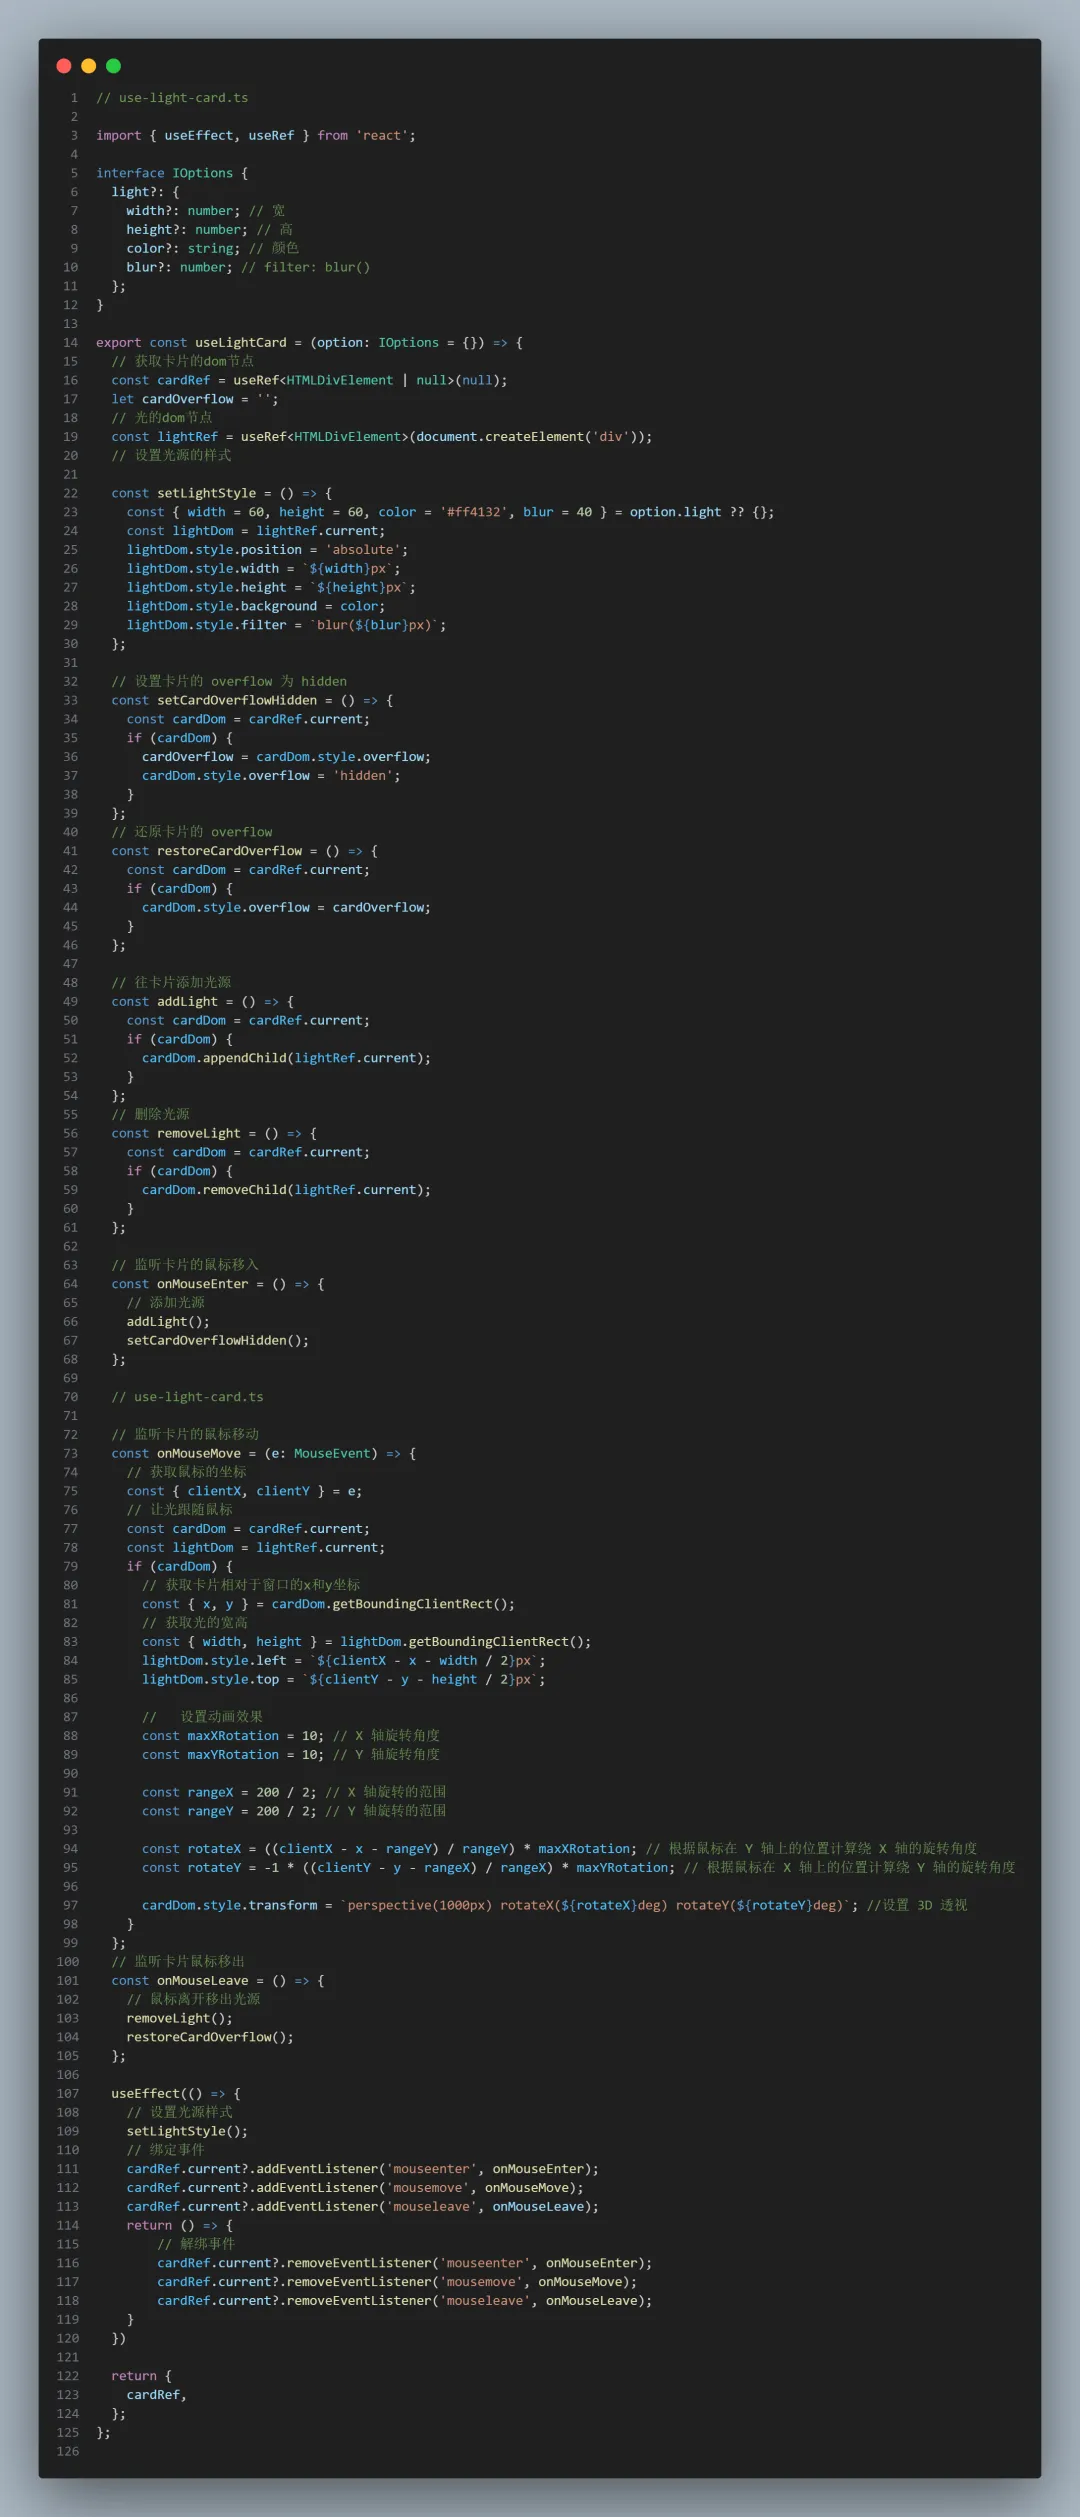
所以 hooks 内部要自己通过操作 DOM 的方式,去添加、删除光源,可以使用createElement、appendChild、removeChild 去做这些事~

// use-light-card.tsimport { useEffect, useRef } from 'react';interface IOptions { light?: { width?: number; // 宽 height?: number; // 高 color?: string; // 颜色 blur?: number; // filter: blur() };}export const useLightCard = (option: IOptions = {}) => { // 获取卡片的dom节点 const cardRef = useRef<HTMLDivElement | null>(null); let cardOverflow = ''; // 光的dom节点 const lightRef = useRef<HTMLDivElement>(document.createElement('div')); // 设置光源的样式 const setLightStyle = () => { const { width = 60, height = 60, color = '#ff4132', blur = 40 } = option.light ?? {}; const lightDom = lightRef.current; lightDom.style.position = 'absolute'; lightDom.style.width = `${width}px`; lightDom.style.height = `${height}px`; lightDom.style.background = color; lightDom.style.filter = `blur(${blur}px)`; }; // 设置卡片的 overflow 为 hidden const setCardOverflowHidden = () => { const cardDom = cardRef.current; if (cardDom) { cardOverflow = cardDom.style.overflow; cardDom.style.overflow = 'hidden'; } }; // 还原卡片的 overflow const restoreCardOverflow = () => { const cardDom = cardRef.current; if (cardDom) { cardDom.style.overflow = cardOverflow; } }; // 往卡片添加光源 const addLight = () => { const cardDom = cardRef.current; if (cardDom) { cardDom.appendChild(lightRef.current); } }; // 删除光源 const removeLight = () => { const cardDom = cardRef.current; if (cardDom) { cardDom.removeChild(lightRef.current); } }; // 监听卡片的鼠标移入 const onMouseEnter = () => { // 添加光源 addLight(); setCardOverflowHidden(); }; // use-light-card.ts // 监听卡片的鼠标移动 const onMouseMove = (e: MouseEvent) => { // 获取鼠标的坐标 const { clientX, clientY } = e; // 让光跟随鼠标 const cardDom = cardRef.current; const lightDom = lightRef.current; if (cardDom) { // 获取卡片相对于窗口的x和y坐标 const { x, y } = cardDom.getBoundingClientRect(); // 获取光的宽高 const { width, height } = lightDom.getBoundingClientRect(); lightDom.style.left = `${clientX - x - width / 2}px`; lightDom.style.top = `${clientY - y - height / 2}px`; // 设置动画效果 const maxXRotation = 10; // X 轴旋转角度 const maxYRotation = 10; // Y 轴旋转角度 const rangeX = 200 / 2; // X 轴旋转的范围 const rangeY = 200 / 2; // Y 轴旋转的范围 const rotateX = ((clientX - x - rangeY) / rangeY) * maxXRotation; // 根据鼠标在 Y 轴上的位置计算绕 X 轴的旋转角度 const rotateY = -1 * ((clientY - y - rangeX) / rangeX) * maxYRotation; // 根据鼠标在 X 轴上的位置计算绕 Y 轴的旋转角度 cardDom.style.transform = `perspective(1000px) rotateX(${rotateX}deg) rotateY(${rotateY}deg)`; //设置 3D 透视 } }; // 监听卡片鼠标移出 const onMouseLeave = () => { // 鼠标离开移出光源 removeLight(); restoreCardOverflow(); }; useEffect(() => { // 设置光源样式 setLightStyle(); // 绑定事件 cardRef.current?.addEventListener('mouseenter', onMouseEnter); cardRef.current?.addEventListener('mousemove', onMouseMove); cardRef.current?.addEventListener('mouseleave', onMouseLeave); return () => { // 解绑事件 cardRef.current?.removeEventListener('mouseenter', onMouseEnter); cardRef.current?.removeEventListener('mousemove', onMouseMove); cardRef.current?.removeEventListener('mouseleave', onMouseLeave); } }) return { cardRef, };};// Index.tsximport './Index.less'import { useLightCard } from './use-light-card'const Index = () => { const { cardRef: cardRef1 } = useLightCard() const { cardRef: cardRef2 } = useLightCard({ light: { color: '#ffffff', width: 100 } }) const { cardRef: cardRef3 } = useLightCard({ light: { color: 'yellow' } }) return <div className='light-card-container'> {/* 方块盒子 */} <div className='item' ref={cardRef1}></div> {/* 方块盒子 */} <div className='item' ref={cardRef2}></div> {/* 方块盒子 */} <div className='item' ref={cardRef3}></div> </div>}export default Index// Index.less.light-card-container { background: black; width: 100%; height: 100%; padding: 200px; display: flex; justify-content: space-between; .item { position: relative; width: 125px; height: 125px; background: #1c1c1f; border: 1px solid rgba(255, 255, 255, 0.1); // 不需要了 // .light { // width: 60px; // height: 60px; // background: #ff4132; // filter: blur(40px); // position: absolute; // } }}
本文链接://www.dmpip.com//www.dmpip.com/showinfo-26-92131-0.html使用 React Hooks 实现鼠标悬浮卡片发光的动画效果
声明:本网页内容旨在传播知识,若有侵权等问题请及时与本网联系,我们将在第一时间删除处理。邮件:2376512515@qq.com